Introduction to Tortilla Pizza Delight
Discover the Charm of a 5-Minute Meal
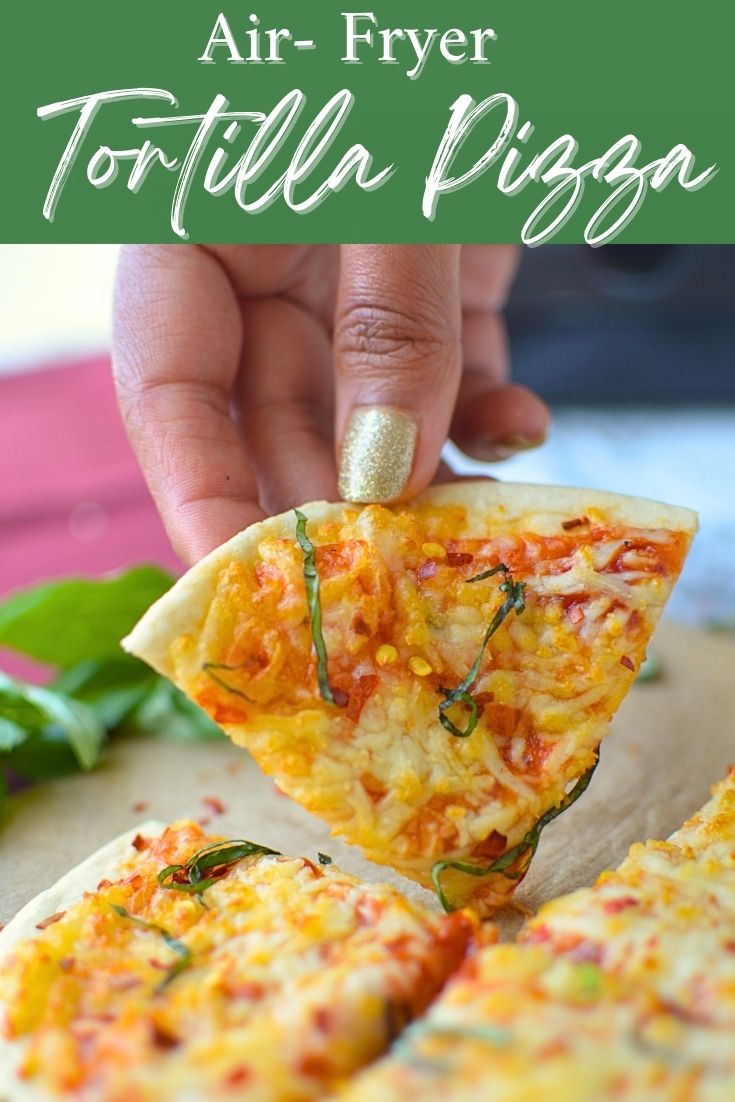
Who does not like Pizza? My kids are big fans of homemade pizza. They love to add ingredients themselves and make it very personalized. Making pizza at home requires a lot of prep, but what if I told you that the perfect pizza doesn't require hours of waiting or a phone call to your local pizzeria? That's right, with a simple twist, you can create a delicious tortilla pizza in just a matter of minutes!
Come JOIN US on Instagram @thebellyrulesthemind.official and Pinterest @Bellyrulesdmind and be a part of our community and discuss various recipes, tips and tricks.
Tired of the extended wait times and complex recipes for a slice of heavenly pizza? Embrace the allure of a scrumptious fix that takes no more than a clock tick-or five minutes, to be precise. Yes, you heard that right! Five little minutes stand between you and a delicious slice of tortilla pizza that combines convenience with mouthwatering goodness.
From Simple Ingredients to Pizza Perfection
Transforming those humble kitchen staples into a mouth-watering meal is nothing short of culinary alchemy. When it comes to the tortilla pizza, the beauty lies in its accessibility and the vibrancy of flavors you can achieve from a few uncomplicated ingredients. It all starts with a simple tortilla, a blank canvas waiting to be adorned with your favorite sauces, cheeses, and toppings. This is where your inner chef shines, creating a bespoke pizza perfection that rivals the classics, adapted to suit your palate, mood, or the eager requests of your dining companions. From the satisfying crunch of the crust to the melty, gooey goodness of cheese, each bite is a love letter to pizza enthusiasts everywhere-crafted by you, in the comfort of your kitchen, in no more time than it takes to boil pasta or prep a quick salad.

Unveiling the Magic Ingredients
Essentials for Your Tortilla Pizza Base
Imagine a pizza where every slice is blessed with the perfect amount of crunch-a dream becoming a reality with the choice of your tortilla base. Whether store-bought or homemade, soft flour tortillas are the cornerstone of this culinary delight. They crispen up beautifully, providing a firm foundation that is essential for holding your chosen treasures of toppings.
Now, don't forget the brush of olive oil. It's not just a frivolous addition; this is what gives your tortilla that irresistible golden crust and a richness that ties all the flavors together.
As for the sauce, it's really about what tantalizes your taste buds. Traditionalists might opt for a classic tomato pizza sauce-but why not experiment with marinara, alfredo, pesto, or even a smoky BBQ sauce? Get creative and match your sauce to your mood or the theme of your meal. After all, variety is the spice of life!
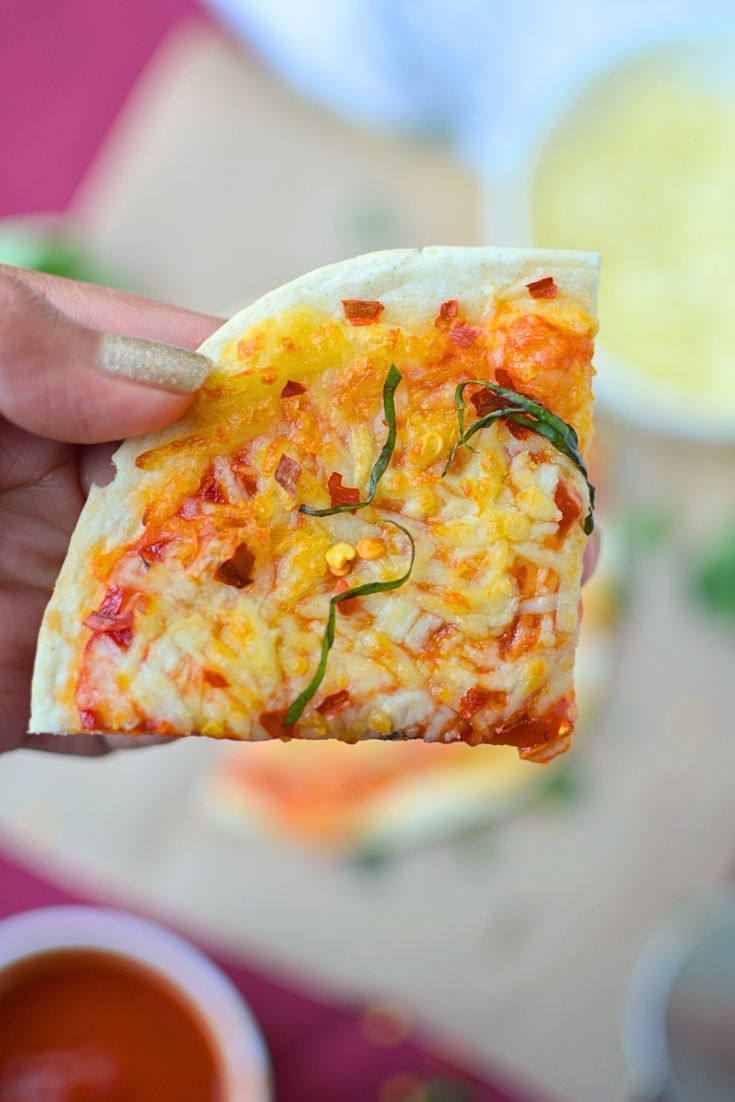
And lastly, a word on cheese. Mozzarella is the go-to for its wonderful meltability and mild taste, allowing other flavors to shine through.
Additional Toppings and Flavors that Make the Magic Happen
In the realm of tortilla pizza, the toppings are akin to the spellbinding charms that complete the magic. Here lies your opportunity to express culinary creativity and tailor your meal precisely to your cravings. Let's construct a lineup of toppings that can turn your pizza into a symphony of flavors:
- Mushrooms: Offering a substantial bite and earthiness.
- Bell Peppers: They sprinkle on vibrancy with their crunch and sweetness.
- Spinach: Wilted slightly for a tender, nutritious boost.
- Artichokes: Marinated for a tangy twist.
- Roasted Garlic: Mild, sweet, and imbued with umami.
- Parmesan: Grated for a salty, nutty crackle.
- Fresh Mozzarella: Torn into chunks for creamy pockets.
- Goat Cheese: Crumbled for a tangy counterpoint.
- Crushed Red Pepper Flakes: A dash for those who walk on the fiery side.
- Italian Seasoning: A whisper of the old world.
- Fresh Basil: Torn onto the hot surface post-baking for a fragrant finale.
With such a plethora of options, you'll never have to endure a monotonous meal. Remember that the secret isn't just in variety, but also in balance-a harmonious blend where no single ingredient overpowers another, with each contributing to the delicious whole.
Happy topping! ?
The Spellbinding Steps to Your Quick Feast
Air Fryer Tortilla Pizza
Ingredients
Embracing the allure of the air fryer for pizza-making is a revelation for speed, convenience, and that essential crisp factor. If you want to harness the powers of this modern kitchen gadget for crafting your tortilla pizzas, here's how to achieve irresistibly crispy results:
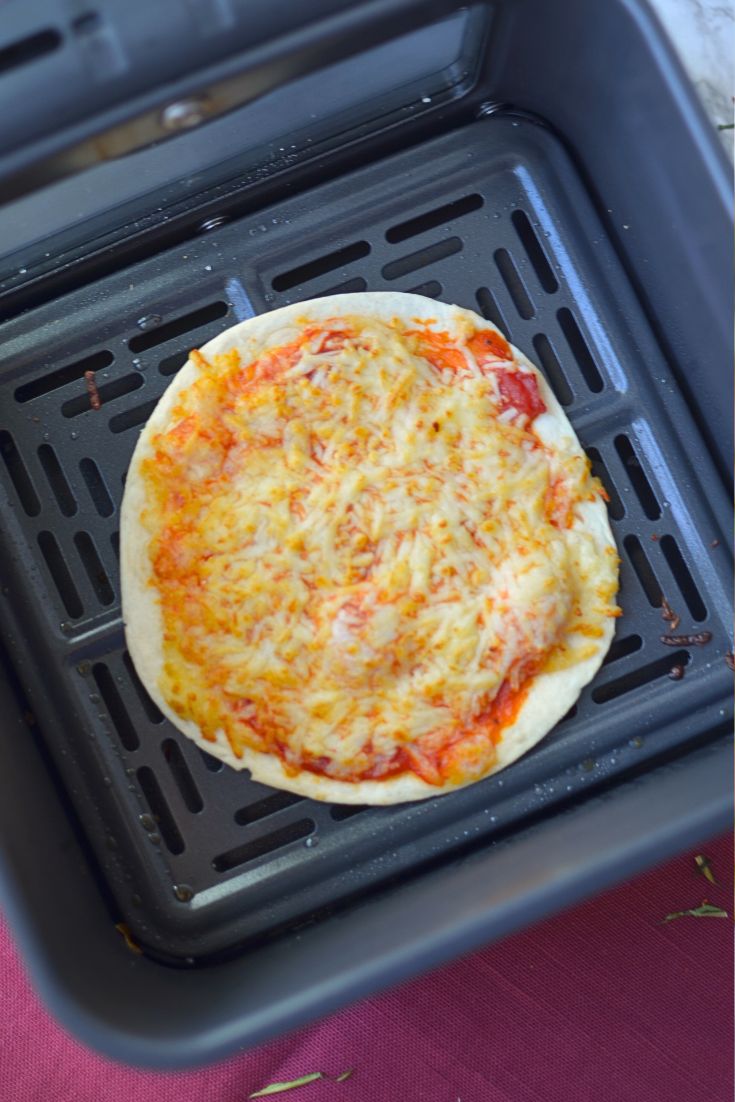
- Prep Your Tortilla: Begin by placing your tortilla in the air fryer basket. A spritz of oil can ensure extra crispness, but the air fryer's natural convection should suffice to avoid sogginess.
- Apply Your Sauce Tactfully: Spread a thin layer of pizza sauce, leaving about an inch from the edge clear to mimic a crust and prevent sauce from spilling during the air frying process.
- Layer Your Toppings: Add your cheese evenly over the sauce and then arrange your optional additional toppings. Remember, the air fryer works quickly, so there's no need for pre-cooking most toppings.
- Air Frying Alchemy: Set the temperature to 400°F, and cook for about 4 minutes, or until you notice the edges brown and the cheese bubbling with joy. Air fryers do their magic swiftly, so keep an eye on your pizza to prevent overcooking.
- The Grand Reveal: Once done, let it cool for a moment in the basket before transferring it to a plate. The cooling period allows the crust to firm up further.
- Serving: Slice into small edible pieces and it's ready to serve! The air fryer produces a particularly crisp base and evenly melted cheese, all in a blink compared to traditional methods.
- Safety Tip: Use tongs or a spatula to remove the hot pizza safely from the air fryer basket to avoid burns.
With these steps, the air fryer provides a stage for tortilla pizza that rivals any conventional oven, toasting it to just the right degree of crunch and melting the toppings to perfection. Plus, it's a phenomenal option for making single servings or back-to-back personalized pizzas for a gathering. Strap in for a delicious ride through the clouds of air-fried pizza bliss-your kitchen will never be the same!
Additional Adventurous Flavor Twists for the Bold Palates
For the culinary adventurers and the flavor thrill-seekers, the tortilla pizza offers an inspiring canvas upon which to paint with bolder, more exotic strokes. Embark on a taste odyssey with these inventive topping combinations that dare to defy the norm and tantalize the taste buds:
- Barbecue Paneer Fiesta: Swap the traditional red sauce for smoky barbecue, add roasted paneer, thinly sliced red onions, and finish with a blend of mozzarella and sharp cheddar. A sprinkle of cilantro post-baking offers a fresh kick.
- Mediterranean Medley: Bring the sun-soaked flavors of the Mediterranean to your table with a pesto base, followed by sun-dried tomatoes, artichoke hearts, Kalamata olives, feta cheese, and a swirl of extra virgin olive oil.
- Taco Tuesday Twist: Reinvent taco night with a piquant salsa as your base. black beans for protein, introduce cheddar cheese, and once out of the oven, top with shredded lettuce, diced tomatoes, and a dollop of sour cream.
- Sweet & Spicy Asian: Merge culinary worlds with a sweet chili sauce base, dot with tofu, and add colorful bell peppers. Top with mozzarella, then after baking, garnish with spring onions and a drizzle of sriracha.
- Buffalo Tempest: For those who like it hot, slather your tortilla with buffalo sauce, arrange strips of blue cheese, and panner or tofu. Post-bake, cool the blaze with a scattering of diced celery and a drizzle of blue cheese or ranch dressing.
Smart Tips for Tortilla Pizza Wizards
Pro Tips - Achieving Ultimate Crisp Without the Flop
The quest for the quintessential crisp in tortilla pizza is akin to finding the Holy Grail of home cooking. You want a crust that snaps with a bite, yet still showcases the pliability needed to hold a wealth of toppings. Here's how to achieve this delicate balance and ensure your tortilla pizza is crisp, without the dreaded flop:
- Thinner is Better: Choose a thin, quality tortilla as your base; this will ensure it crisps up nicely without becoming too thick or bread-like.
- Minimal Oil, Maximum Heat: Brush your tortilla with a light coat of oil to help achieve a golden-brown hue. Preheat your skillet or baking sheet as hot as possible before adding the tortilla to sear the underside quickly.
- Watch the Wetness: Your sauce can be a culprit in limp pizzas. It should be thick and spread thinly to avoid seeping into the tortilla. Let the toppings, not the sauce, lead the flavor parade.
- Pre-Cook Weightier Toppings: If using denser ingredients like raw vegetables or meats, give them a quick pre-cook. This step helps remove excess moisture that could otherwise steam into the tortilla and weaken its structure.
- Be Strategic with Cheese: Sprinkle your cheese evenly, allowing it to act as a barrier between the sauce and the more watery toppings, thereby preventing sogginess.
- Cooling Off: Letting your pizza sit for a minute after it comes out of the oven can be beneficial. The cooling period allows the crust to hold form, making for easier handling and a crisp that withstands the weight of the cut.
Follow these sage steps and watch as the crisp, sturdy, yet indulgently edible plateau of your tortilla pizza comes to life, able to elevate your toppings without fear of a dreaded droop.
Secrets to Keeping Your Toppings Intact
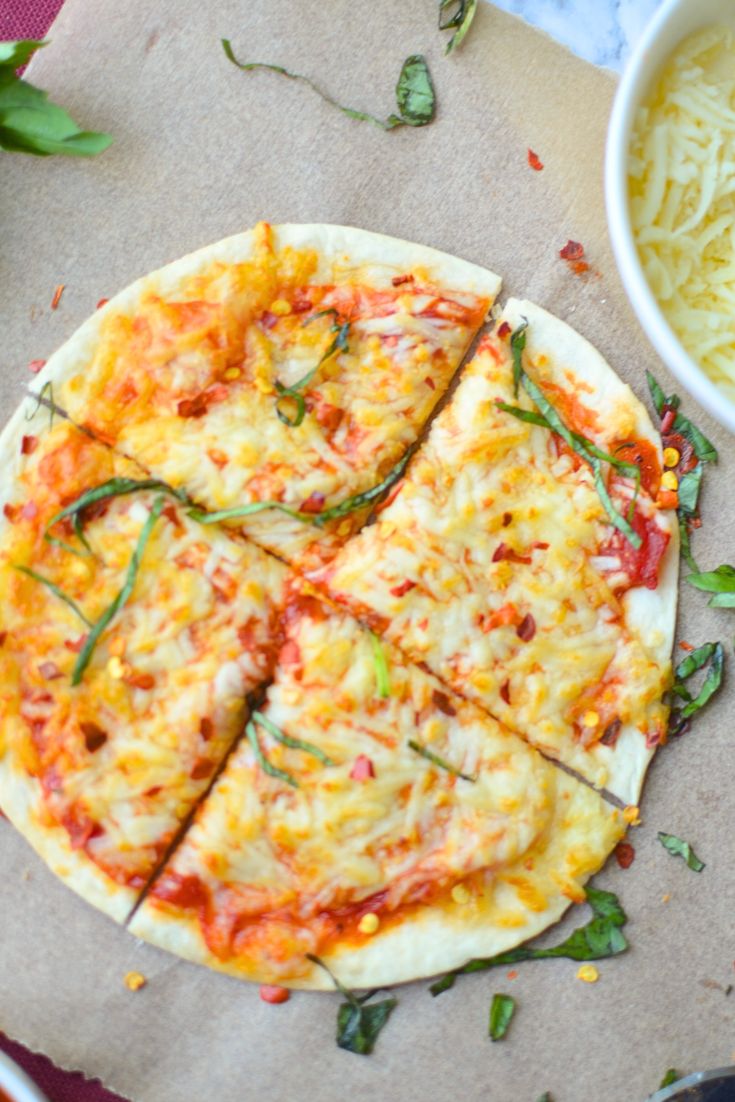
Indeed, a tortilla pizza with toppings strewn about post-bake is a plight many face, but fear not-with a sprinkle of wisdom and a few strategic moves, your pizza can be as picturesque post-oven as it was pre-bake. Here are the secret incantations to keep your toppings exactly where they belong:
- Cheese as the Glue: Introduce a foundation of melty cheese directly over the sauce-laden tortilla base. This initial layer acts as a binding agent, securing subsequent ingredients upon its sticky surface.
- Think Thin and Light: Cut toppings like vegetables, meats, and fruits into thin slices or small pieces. The lighter they are, the less likely they are to tumble off the crust when it's time to take a bite.
- Spread Evenly: Even distribution of toppings prevents any single area from becoming too top-heavy, which can cause an imbalance in flavor as well as an increased chance of ingredient landslides.
- Layer Smart: Hardier ingredients like onions, peppers, or pepperoni can be placed beneath a final cheese layer. Soft, delicate items like herbs or greens can be added after cooking to retain their texture and prevent them from scattering.
- Press Lightly: After adding each layer of toppings, especially the final layer, gently press them down. It's not about smashing; it's a soft encouragement to adhere to their cheesy bed.
- Less is More: While it's tempting to load up on toppings, remember the tortilla's integrity. A lighter hand will ensure a better bite where the flavors shine, and the toppings stay in place.
- The Cooling Spell: As with achieving crispness, a brief cooling period after the oven can help the cheese solidify, thereby locking in the toppings before cutting into wedges.
Serving and Storage Suggestions
How to Cut and Serve Your Pizza Masterpiece
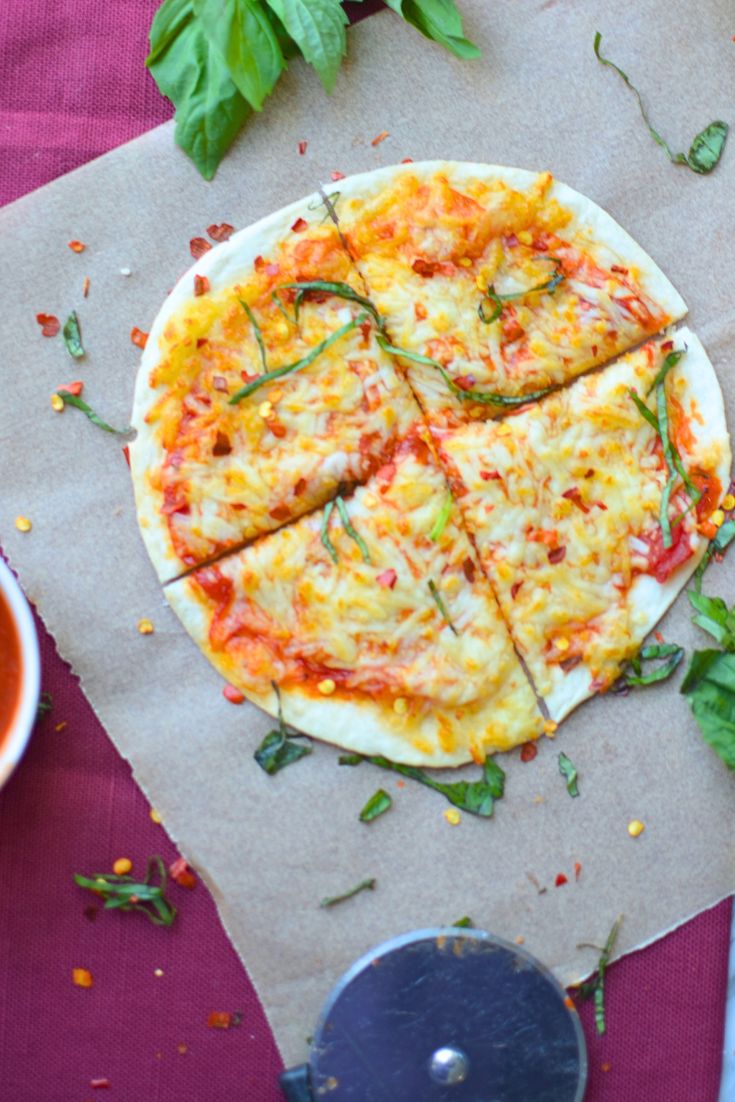
With your tortilla pizza now a golden mosaic of melted cheese and tantalizing toppings, resisting the urge to immediately dive in can be challenging. First, you must perform the delicate ritual of cutting and presentation to truly honor the flavors you've artfully assembled. Here's how to ensure your slicing technique is as deft as your culinary skills:
- Cool Before the Cut: Let your pizza rest for a few minutes post-oven. This brief respite permits the cheese to firm up slightly, preventing a molten landslide when the pizza wheel (or knife) makes its entry.
- Choose Your Tool: A pizza wheel, with its rolling blade, is designed for traversing the cheesy terrain smoothly. For those without, a large, sharp chef's knife can be an adequate substitute. A gentle rocking motion rather than a forceful push will yield cleaner cuts.
- Divide with Precision: Aim for a standard six to eight slices depending on pizza size, ensuring that each piece is manageable and captures a sample of every topping. Guide your tool from the center outward, ensuring each incision is decisive and thorough.
- Plate with Panache: Use a spatula to lift and transfer slices onto plates or a serving platter. A little flourish when plating emphasizes that this is no ordinary snack-it's a handcrafted epicurean delight.
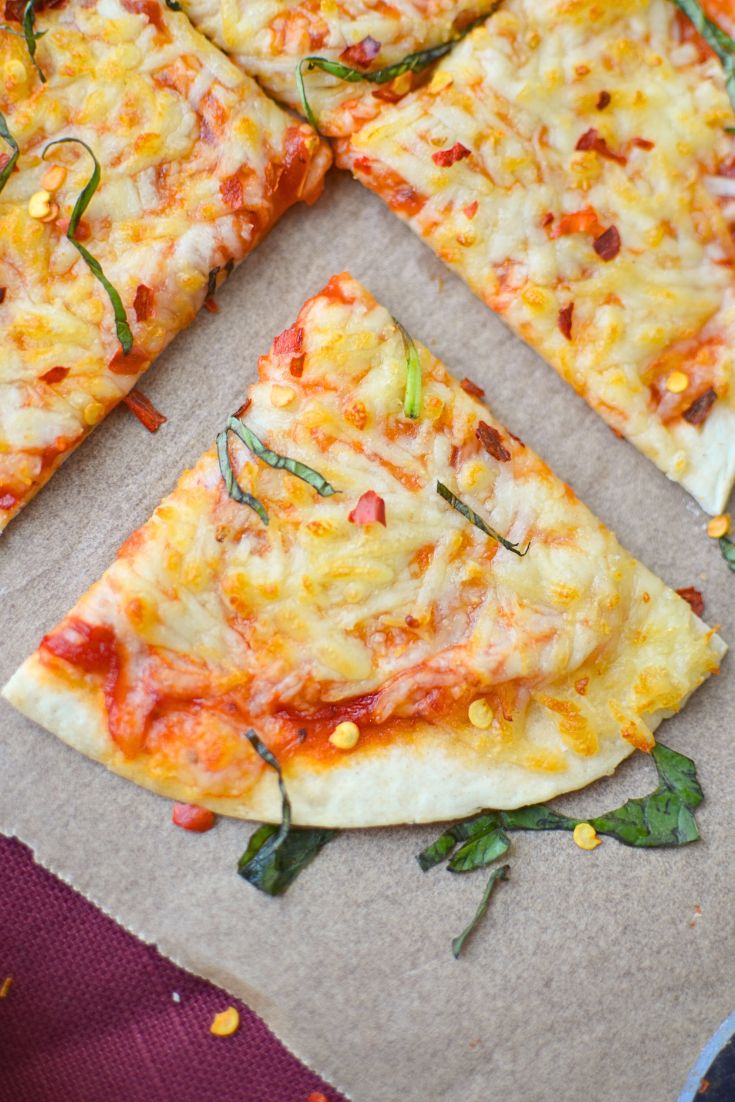
- Accessorize Wisely: Consider a finishing touch just before service-perhaps a drizzle of high-quality olive oil, a sprinkling of chili flakes, or a flourish of fresh herbs. These final gestures brighten flavors and heighten the sensory experience.
- Serve Immediately: With all elements perfectly in place, serve up your tortilla pizza posthaste. The harmony of a warm, crisp crust, oozy cheese, and fresh toppings is ephemeral and best enjoyed right away.
Best Practices for Leftovers (If Any!)
It's a rare occasion that a pizza this enticing leaves stragglers, but should you find yourself the guardian of leftover slices, fear not-there is an art to preserving their charm for a later indulgence. The key is to maintain the integrity of the crispy crust and the freshness of the toppings. Here are the best practices to keep your tortilla pizza enjoyable even after the initial feast:
- Cool Completely: Before storing, allow your pizza to reach room temperature. Piling leftovers while still warm can trap steam and lead to sogginess.
- Avoid the Plastic Wrap Trap: Rather than wrapping leftovers in plastic, which can create moisture, opt for an airtight container. This will keep the pizza from drying out while preventing condensation from ruining the texture.
- Refrigerate Right: Place your cooled, protected pizza in the refrigerator. It should stay appetizing for four to five days, though it's best savored sooner rather than later for optimal flavor.
- Revitalize in Heat: When you're ready to reheat, resist the microwave's siren call, as it will rob your pizza of its crispness. Instead, reheat slices in the oven or toaster oven at 350°F for about five minutes, restoring some of the original crunch and warmth.
By adhering to these simple yet effective practices, you can extend the life of your tortilla pizza leftovers and enjoy them almost as much as when they first emerged, steaming and irresistible, from your oven.
Customization Spells for Special Diets
Vegan and Gluten-Free Variations
Catering to special dietary needs doesn't mean you have to sacrifice the ritual of pizza night. With a few ingenious swaps, you can conjure up a tortilla pizza that's both vegan and gluten-free without skimping on taste or satisfaction. Let's explore these inclusive variations:
- Choosing the Right Tortilla: Seek out gluten-free tortillas made from ingredients like corn, almond, coconut, or cassava flour. Ensure they're pliable enough to mimic the texture of a traditional wheat tortilla.
- Rethink Your Cheese: Vegan cheese has come a long way, with options made from nuts, soy, and tapioca that melt beautifully. Nutritional yeast can also lend a cheesy, umami-rich complement when sprinkled over your pizza.
- Savory Sauces: Many pizza sauces are already vegan, but always read labels for hidden animal products. For homemade sauce, a blend of crushed tomatoes, garlic, herbs, and a touch of olive oil can create a simple, delightful base.
- Pile on Plants: Most vegetables are game for your vegan, gluten-free pizza. From roasted red peppers to sautéed spinach or caramelized onions, the vegetable kingdom is ripe for exploration.
- Protein with Plants: For that protein punch, consider chickpeas, marinated tofu, tempeh, or seasoned lentil crumbles. These not only provide heft and heartiness but also absorb flavors from herbs and spices beautifully.
- Herbs and Final Flares: Fresh basil, oregano, and other herbs infuse your pizza with that quintessential Italian flair. A drizzle of balsamic glaze or a sprinkle of red pepper flakes just before serving can elevate the final product to gourmet heights.
Creating vegan and gluten-free tortilla pizzas allows for an inclusive table where dietary restrictions are not barriers but inspiration for creativity. Such mindful cooking ensures everyone can gather around and enjoy the timeless joy of a pizza shared.
Welcoming all diners to the table, including those with dietary restrictions, is effortlessly achieved with tortilla pizza, thanks to its versatility. Crafting a pizza that's both vegan and gluten-free without compromising on taste is a cinch with the right ingredients.

Frequently Asked Questions (FAQs)
Can I Use Any Type of Tortilla for This Recipe?
When it comes to selecting the right foundation for your tortilla pizza, one question often rises to the crest: Can any type of tortilla be used? The answer rests largely on personal preference and dietary needs, but for optimal results here are some guidelines:
- Flour Tortillas: These are traditionally preferred for tortilla pizzas due to their ability to crisp up nicely without breaking, and they handle the weight of various toppings well. They come in various sizes, from personal pizza to large shareable ones.
- Corn Tortillas: These often bring a distinct flavor that's not typical of conventional pizza. They can also be less sturdy, which might result in a less crisp base. Those looking for a gluten-free option, however, might use thicker corn tortillas, bearing in mind the nuanced end result.
- Whole Wheat Tortillas: A wholesome choice that brings added fiber and a nuttier taste. They can work well but might not crisp up as much as their white flour counterparts.
- Low-Carb/Keto Tortillas: Made from low-carb sources such as almond flour or coconut flour, these are perfectly suitable and will help keep the pizza within dietary carb limits.
- Gluten-Free Tortillas: Available in various compositions such as rice flour or a blend of gluten-free flours, they are a suitable choice for those with gluten sensitivities. It's important to choose ones that are sturdy enough to hold toppings when using this variety.
In short, yes, you can use any type of tortilla for this recipe, but remember that the type chosen will affect the texture, strength, and flavor of your pizza. It's worth experimenting to find the variety that best aligns with your taste and texture preferences. Whatever tortilla serves as your crust, approach your culinary expedition with zeal, and you'll surely discover the combination that makes your pizza-loving heart sing.
How to make Tortilla Pizza in the Oven
Making tortilla pizza in the oven is a straightforward and satisfying process that results in a delicious, crispy treat. It is perfect for those days when you need to whip up a quick dish with minimal effort and maximum flavor. Follow these steps, and get ready to enjoy pizza that gives a playful nod to tradition while keeping things light and speedy.
Preheat to Perfection:
Start by preheating your oven to a hot 425°F (218°C). If you have a pizza stone, place it in the oven now to preheat as well; this will help you achieve a crisper bottom crust.
Assemble with Attitude: Place a tortilla on a baking sheet. Then, spread a thin layer of your preferred pizza sauce onto the tortilla, stopping slightly short of the edge-this is your pizza border. Sprinkle a mix of grated mozzarella and any other cheese you love over the sauce.
Top It Off: Now, let your culinary imagination roam free as you scatter your preferred toppings across the saucy, cheesy landscape. Go for classics like pepperoni or bell peppers, or be bold with less traditional options like sliced figs and goat cheese.
Bake to Crisp-Crusted Glory: Carefully slide the baking sheet (or use a peel to place the pizza directly on the preheated stone) into the oven. Bake for about 5 to 7 minutes, but keep a keen eye out; your pizza is ready when the cheese is molten and gloriously bubbly, with the edges of the tortilla crisp and perfectly browned.
Cool and Slice, Serve and Savor
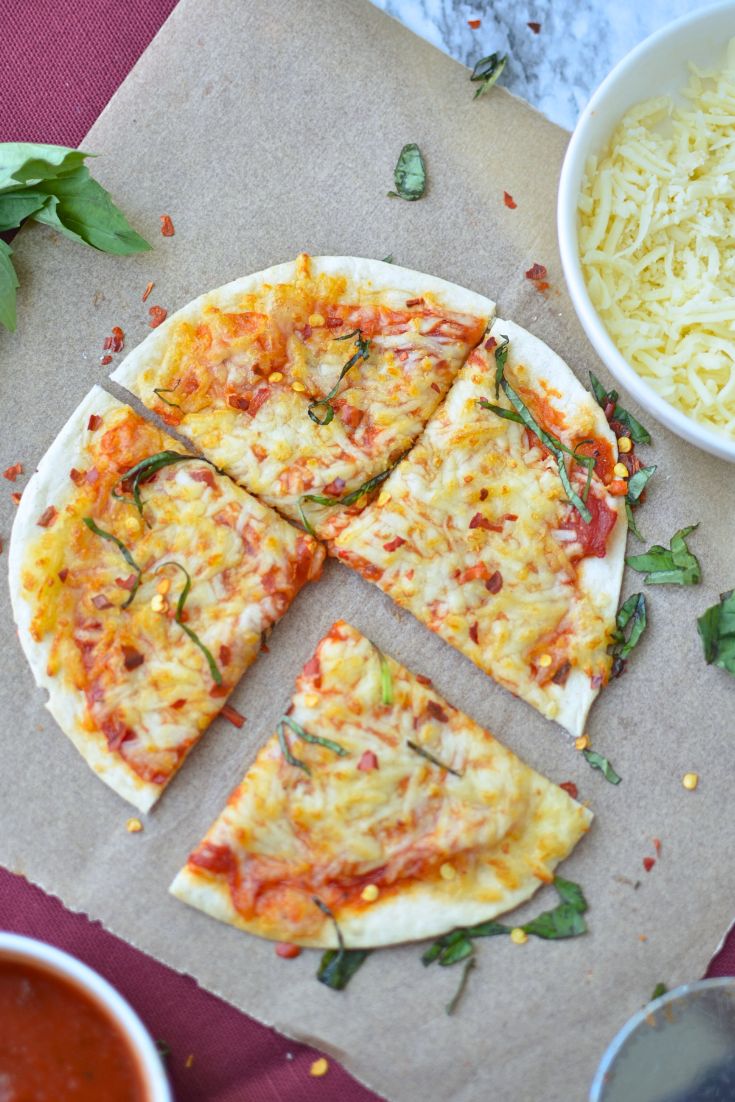
Allow the pizza to cool for a couple of minutes once removed from the oven. This minor patience pays off as it makes slicing easier and gives the cheese a chance to set slightly.
Serve and Savor: Use a pizza cutter or a sharp knife to portion your creation into slices. Serve it immediately, and bask in the glory of your oven-crafted tortilla pizza.
There you have it-a superbly simple method for a pizza night that doesn't require hours of dough preparation or cleanup but still satisfies your deepest pizza cravings. So, preheat that oven and make pizza magic happen in minutes! Enjoy!
Looking for more after school Snacks?
- Tater Crowns
- French Fries
- Texas Toast
- Mozarella Sticks
- Apple Chips
- Banana chips

Air Fryer Tortilla Pizza
- Total Time: 0 hours
Description
Making pizza at home requires a lot of prep, but what if I told you that the perfect pizza doesn't require hours of waiting or a phone call to your local pizzeria? That's right, with a simple twist, you can create a delicious tortilla pizza in just a matter of minutes!
Ingredients
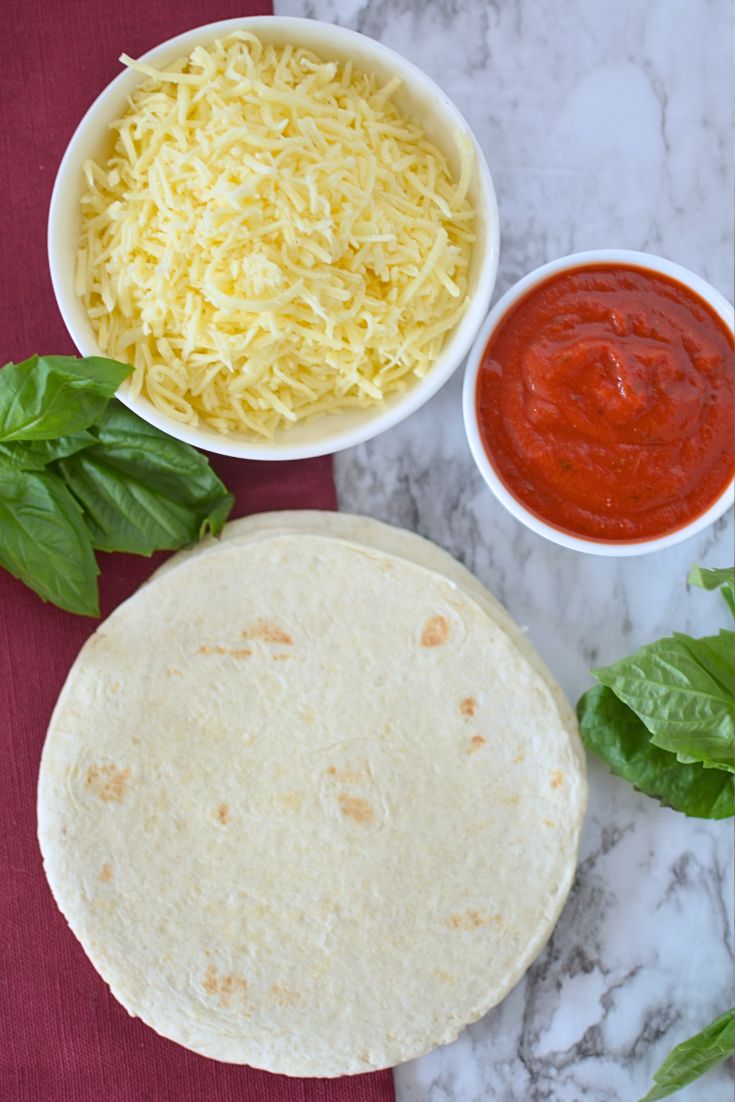
- 2 Flour Tortilla
- ¼ cup Marinara / Pizza Sauce
- ¼ cup Mozzarella cheese
Optional Toppings
- Mushrooms
- Bell Peppers
- Spinach
- Artichokes
- Roasted Garlic
- Parmesan
- Fresh Mozzarella
- Goat Cheese
- Crushed Red Pepper Flakes
- Italian Seasoning
- Fresh Basil
Instructions
- Prep Your Tortilla: Begin by placing your tortilla in the air fryer basket. A spritz of oil can ensure extra crispness, but the air fryer's natural convection should suffice to avoid sogginess.
- Apply Your Sauce Tactfully: Spread a thin layer of pizza sauce, leaving about an inch from the edge clear to mimic a crust and prevent sauce from spilling during the air frying process.
- Layer Your Toppings: Add your cheese evenly over the sauce and then arrange your additional toppings. Remember, the air fryer works quickly, so there's no need for pre-cooking most toppings.
- Air Frying Alchemy: Set the temperature to 400°F, and cook for about 4 minutes, or until you notice the edges brown and the cheese bubbling with joy. Air fryers do their magic swiftly, so keep an eye on your pizza to prevent overcooking.
- The Grand Reveal: Once done, let it cool for a moment in the basket before transferring it to a plate. The cooling period allows the crust to firm up further.
Notes
Try different toppings and flavors
- Barbecue Paneer Fiesta: Swap the traditional red sauce for smoky barbecue, add roasted paneer, thinly sliced red onions, and finish with a blend of mozzarella and sharp cheddar. A sprinkle of cilantro post-baking offers a fresh kick.
- Mediterranean Medley: Bring the sun-soaked flavors of the Mediterranean to your table with a pesto base, followed by sun-dried tomatoes, artichoke hearts, Kalamata olives, feta cheese, and a swirl of extra virgin olive oil.
- Taco Tuesday Twist: Reinvent taco night with a piquant salsa as your base. black beans for protein, introduce cheddar cheese, and once out of the oven, top with shredded lettuce, diced tomatoes, and a dollop of sour cream.
- Sweet & Spicy Asian: Merge culinary worlds with a sweet chili sauce base, dot with tofu, and add colorful bell peppers. Top with mozzarella, then after baking, garnish with spring onions and a drizzle of sriracha.
- Buffalo Tempest: For those who like it hot, slather your tortilla with buffalo sauce, arrange strips of blue cheese, and panner or tofu. Post-bake, cool the blaze with a scattering of diced celery and a drizzle of blue cheese or ranch dressing.
- Prep Time: 0 hours
- Additional Time: 0 hours
- Cook Time: 0 hours
- Cuisine: American
Nutrition
- Serving Size: 1
- Calories: 340
- Sugar: 4
- Sodium: 717
- Fat: 13
- Saturated Fat: 4
- Unsaturated Fat: 8
- Trans Fat: 0
- Carbohydrates: 43
- Fiber: 4
- Protein: 14
- Cholesterol: 12
About Soniya
Hello, I am Soniya, the cofounder of The Belly Rules The Mind. Originally from Mumbai, India, I am settled in Virginia US with my husband.

My hubby and I were born in Mumbai, India, where we were spoiled by the wealth of food choices available to us. We could enjoy everything from yummy street food to multi-cuisine restaurants and we became very picky about what we like and what we don't. Come join us on our journey to have "The Belly Rule The Mind"


Leave a Reply