This easy homemade no knead ciabatta bread recipe, is a tasty version of the classic Italian bread. Your family will adore this freshly baked loaf. With just a few basic ingredients and an easy prep in the Instant Pot, you'll want to make this recipe over and over again so you and your family can enjoy freshly baked bread regularly. Video Recipe.
LET'S BE FRIENDS ON PINTEREST! WE'RE ALWAYS PINNING TASTY RECIPES!
Jump to:
What is Ciabatta Bread?
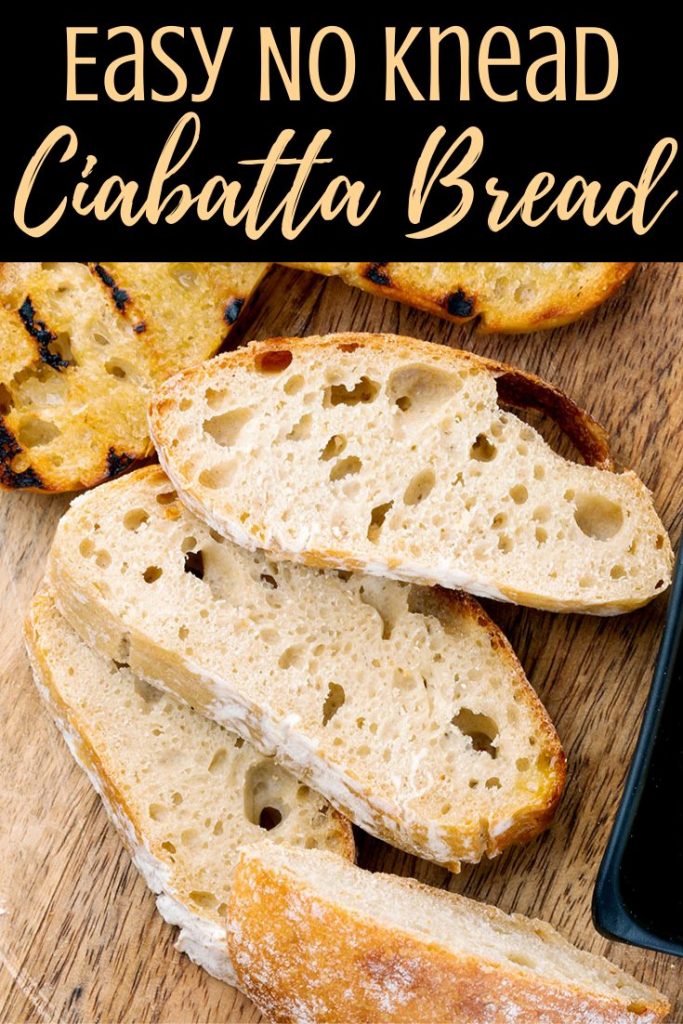
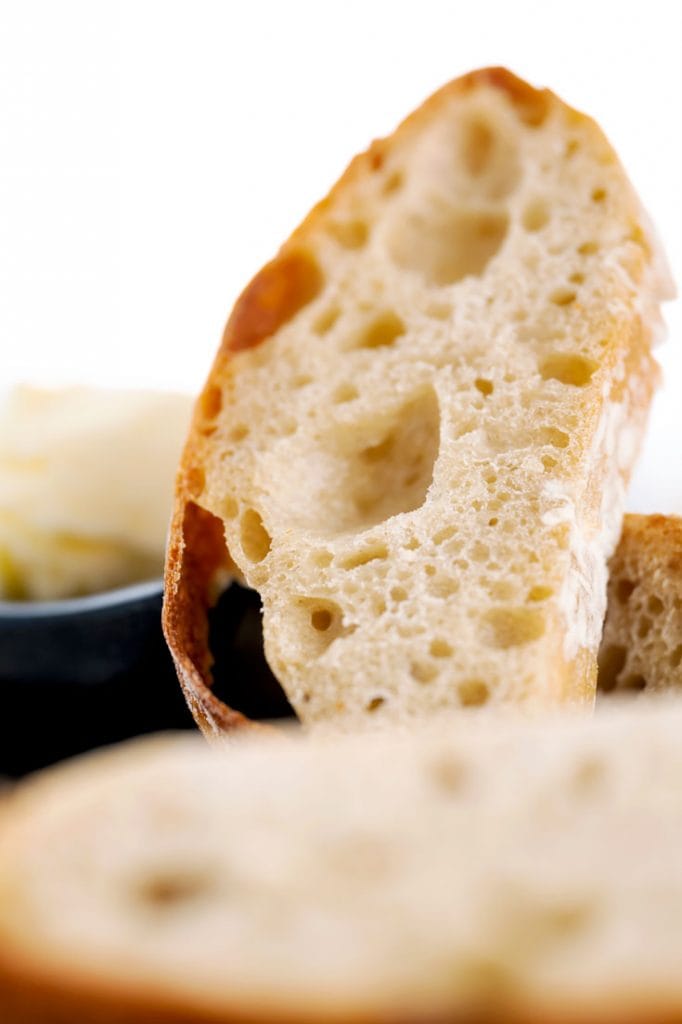
Ciabatta is an Italian white bread that has a crusty exterior and a chewy, moist interior. Little airy pockets break up the interior of the bread.
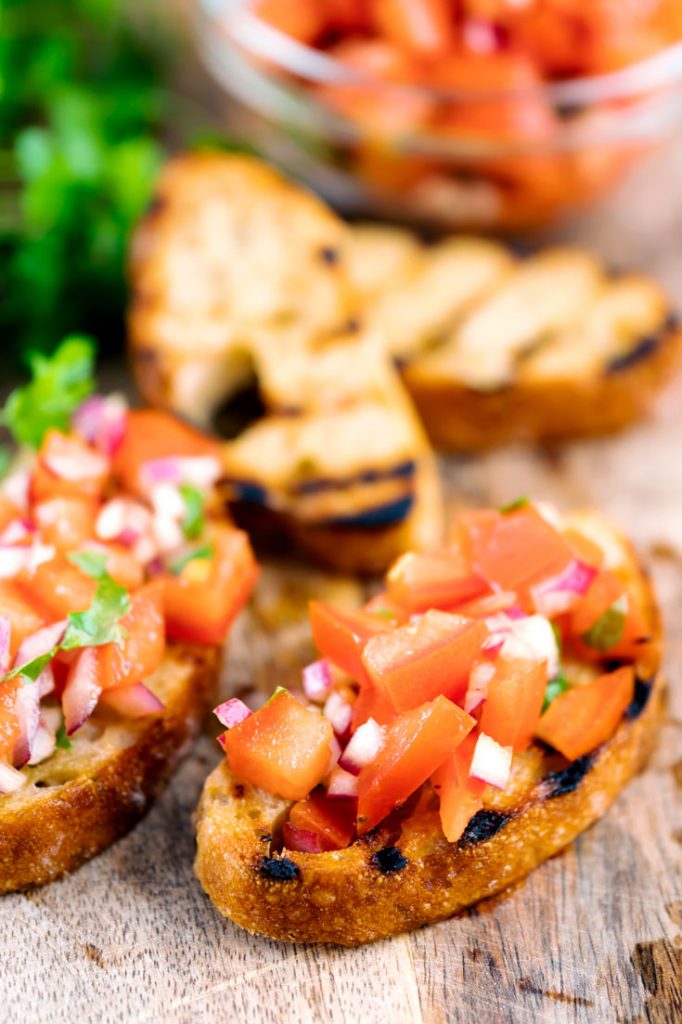
The bread is fantastic for sandwiches, dipped in olive oil, for bruschetta, gourmet toasts or on its own!
Why you will love this ciabatta bread recipe
This Ciabatta bread recipe is super easy and does not require any kneading, which means you don't have to get out your bulky stand mixer.
We've tested this recipe several times. It is as fail safe as you can get, so even non-seasoned bakers can make this recipe with ease. If you follow the instructions, you will have perfect, airy holes in your bread.
We use our Instant Pot to make the dough the proof it, which yields perfect results and reduces so much of that proofing time.
And the best reason of all? Homemade bread just plain tastes better than store bought bread. Make this once and you may not go back to buying ciabatta at the store again.
What do you use Ciabatta for?
Ciabatta is traditionally used for making paninis. Paninis are grilled sandwiches that often have cheese, avocado, roasted veggies, or other ingredients on the inside. Ciabatta is the bread of choice for these grilled treats because they hold up nicely and toast up well.
But you can use ciabatta bread for lots of different purposes. You can serve it alongside your favorite entree or serve it as the base of our delicious avocado toast.
Like all breads, you can use it to soak up your favorite gravies or sauces. It's also a great base for bruschetta.
Ciabatta Bread Recipe Ingredients
You really don't need much to make these simple ciabatta loaves. Here's what you'll need to have on hand.
- Bread flour - Bread flour is usually higher in protein content than other flours. However, you could use all purpose flour if that is what you have on hand but it will change the texture. This recipe has been tested with all purpose flour, bread flour, rye flour, spelt flour and we love them all.
- Yeast - You can use active dry or instant, both work well.
- Salt - This adds just a bit of flavor to the bread.
- Warm tap water - Make sure it is lukewarm to the touch. If it is too hot or cold, it can kill the yeast.
How to make Ciabatta Bread at home
Here's what you need to do to make this amazing bread at home.
Preparing the ciabatta dough in the Instant Pot
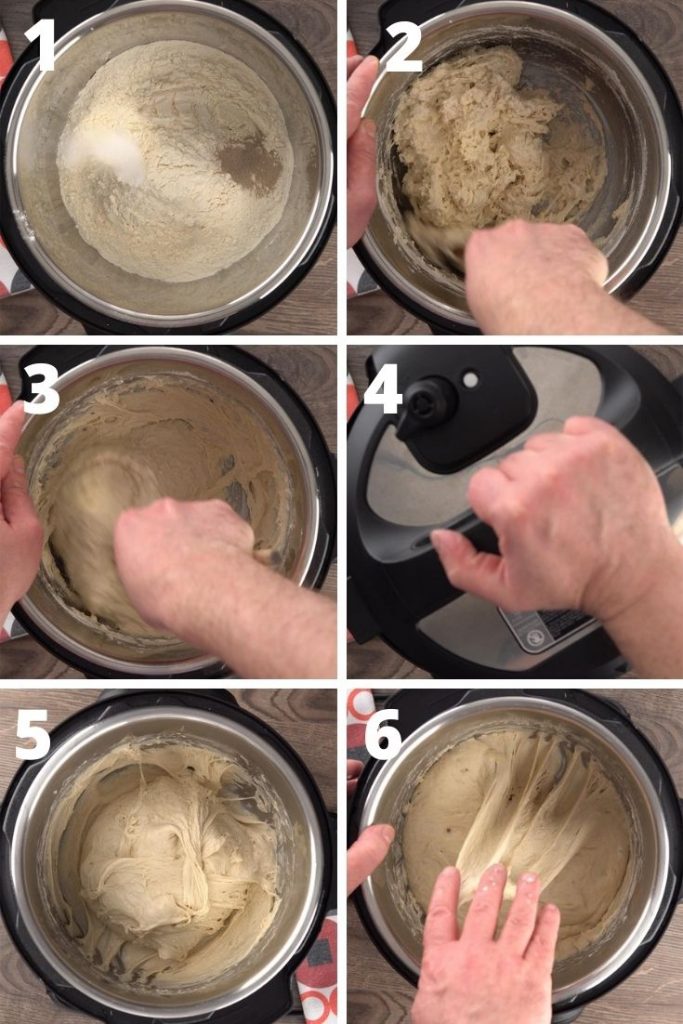
To start, add the flour, salt, and yeast to the inner pot of the Instant Pot and mix it well.
Gradually add water and use a wooden spoon to combine it until it forms a wet sticky dough.
Next, close the lid to the Instant Pot and allow the dough to ferment for an hour on yogurt mode until it becomes puffy and dotted with bubbles.
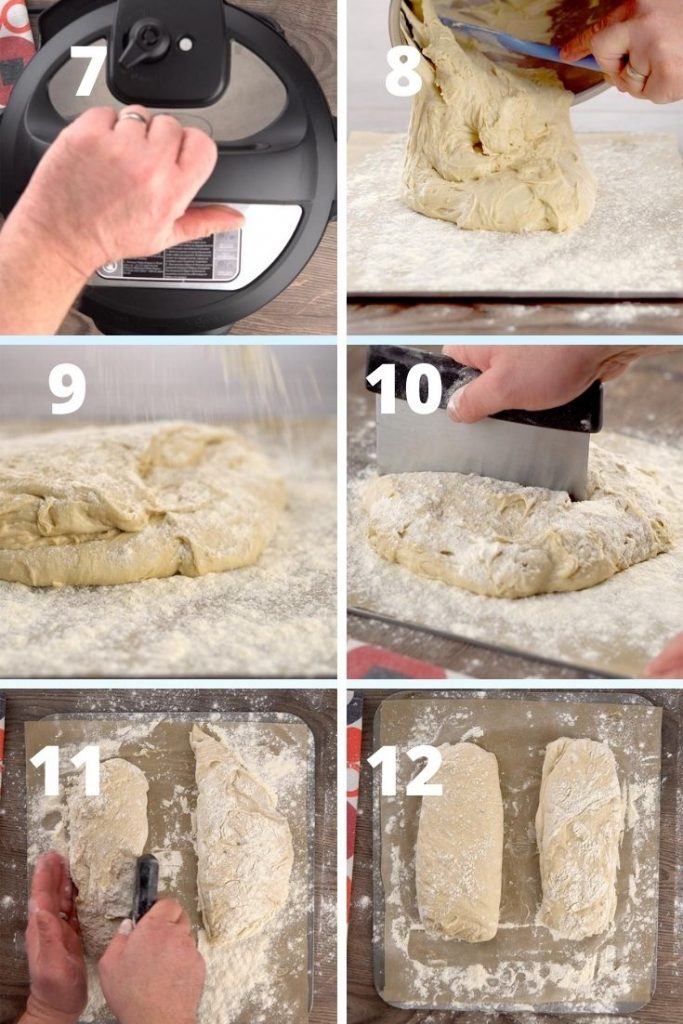
Once the hour has passed, open the lid of the pot. First, wet your hands and then gently stretch and fold the dough in the center of the pot.
Next, close the lid and allow the dough to rest for 15 minutes on yogurt mode.
After 15 minutes, open the lid again and repeat the process of stretching and folding the dough.
Allow the dough to rest again for 15 minutes on yogurt mode. After 15 minutes, stretch and fold the dough one last time.
The dough should be puffy but still wet and sticky.
Finally, place the lid back on top and allow it to rest for 30 more minutes on yogurt mode.
Shaping and Baking the ciabatta bread
When the dough is in its final proofing, preheat the oven to 450 F or 230 C. Place an oven safe bowl with at least 2 cups of water on the bottom In the bottom rack.
Next, line a cookie sheet with parchment paper and then dust it generously with flour.
Carefully transfer the dough onto the parchment paper. You need to make sure you don't destroy the air pockets as you place the bread on the sheet.
Dust more flour on top and use a scraper to divide the dough into two portions for two bread loaves. Use your hands to give the dough a rectangle. Or, you can use the scraper to give it a cleaner rectangle shape.
Next, place the cookie sheet with the dough on the middle rack of the oven. And then throw in a few ice cubes into the bowl of water on the lower rack.
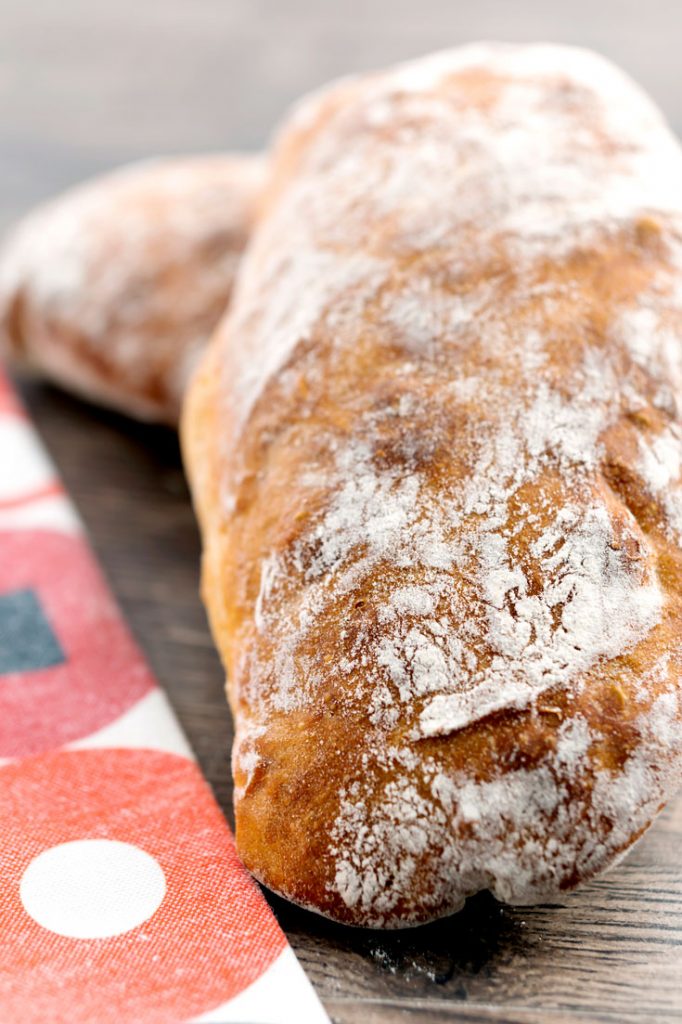
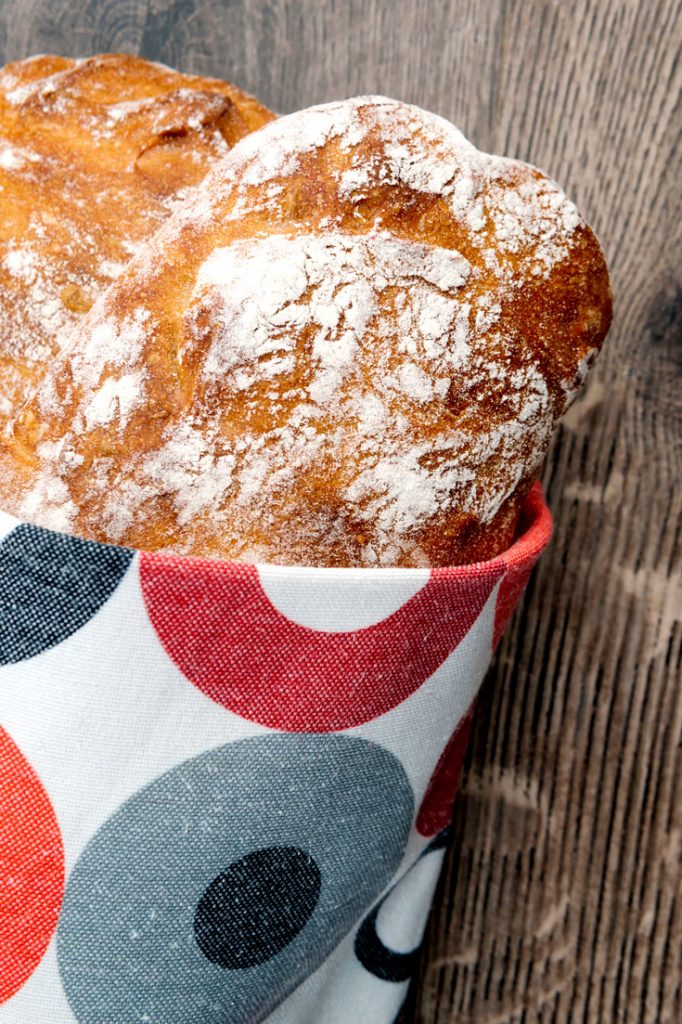
Finally, bake the dough for 30 mins until the bread becomes golden brown on the top and sounds hollow when you tap the bread on the bottom.
Before serving, allow it to cool.
Pro tips and tricks
Here are some pro tips and tricks to making this bread:
- Avoid over-baking the bread.
- Give the dough time to rise and make sure to fold it over. Do not skip the stretching and folding.
- You don't need to knead the dough, this will make it too tough.
- Store in an airtight container for freshness.
- Don't skip the water or ice cubes on the bottom rack of the oven. The environment should be moist when cooking.
- Use flour generously when shaping the dough.
Is this Ciabatta bread vegan?
Yes! Ciabatta is a vegan food. Some people ask about using yeast and whether it is vegan. Though it is a living organism, it is not an animal. It is a part of the fungus family, which makes it acceptable for vegans to eat.
How do you store Ciabatta bread?
Ciabatta stores best in an airtight container. You can place it in the container once it has fully cooled.
If you prefer, you can tightly wrap the ciabatta in plastic wrap and freeze it. If you do this, allow it to thaw in the fridge overnight before reheating. Freezing the bread will make it lose some of its freshness, but you can follow the steps below to reheat it.
How to reheat Ciabatta bread?
If you eat the bread while fresh, you don't have to reheat it. To heat fresh bread, you can set your oven on warm or 200 degrees. Place the loaf on a baking sheet and allow it to sit in the warm oven for about 10 minutes or until it has warmed through.
If the bread has become stale, you can fix that! To rehydrate the bread, preheat your oven to 450. Next, wrap the bread in dampened paper towels. Place the bread in the oven for about 10 minutes or until the bread has softened again.
I don't have a stand mixer, can I knead the dough in a food processor or by hand
The best part of this ciabatta bread recipe is you don't need a stand mixer or food processor. You don't even need to really use your hands. Once you stir the flour, yeast, water, and salt together, you can let it rise in the Instant Pot on proofing mode. Then, you just need to fold it three times over the course of about an hour.
That's it. No need to bust out a stand mixer or food processor.
Flavor variations
Ciabatta bread can be flavored a few different ways. Here are a few suggestions.
- Add sugar and cinnamon for a sweet treat.
- Add a bit of garlic powder and then garnish the top with a butter and fresh garlic mixture.
How to tell your ciabatta bread is done
There is an easy way to tell if your bread is done. Carefully take it out of the oven and flip it with a spatula. Take your thumb and quickly tap the bottom of the bread like you would a drum. If it makes a hollow sound, it is ready to come out of the oven.
If it is not ready, return the bread to the oven and bake another few minutes. Make sure to check it frequently to avoid overbaking the bread.
How to make sure I get those airy pockets in my ciabatta bread
You want to make sure you do not skip or rush the folding process. The folding and rising is what gives the bread the nice air pockets you expect with ciabatta. If you either skip or rush this process, you can lose the air pockets. Patience is the key when prepping the dough!
Some more bread recipes
If you love bread and want more ideas, you should definitely check out some of these other popular bread recipes:
- Bolillo Bread
- Garlic knots
- Olive Garden Breadsticks
- Ladi Pav / Dinner Rolls
- Whole wheat bread
- Banana bread
- Date and walnut bread
Other Italian inspired recipes
If you love Italian recipes, here are a few of our favorites:
- Easy No Yeast Pizza Dough - perfect for homemade pizza night!
- Air fryer pizza rolls - an easy dinner that is perfect for kids of all ages.
- Instant Pot Homemade Marinara Sauce - a great homemade sauce perfect for pizza night or your favorite pasta!
- Italian Lentil Soup - Pair this bread with our dump and stir Italian lentil soup. You won't regret it.
- Minestrone Soup - This bread also goes well with our Minestrone Soup.
Made it, tag it!
Did you make this ciabatta bread recipe? Take a pick and tag us on Instagram @dbellyrulesdmind!
Easy No Knead Ciabatta Bread Recipe
Print
Easy Homemade No Knead Ciabatta Bread Recipe
- Total Time: 2 hours 30 minutes
- Yield: 2 loaves 1x
- Diet: VeganDiet
Description
Easy homemade no knead ciabatta bread is a tasty version of the classic Italian bread. Your family will adore this freshly baked loaf. With just a few basic ingredients and an easy prep, you’ll want to make this recipe over and over again so you and your family can enjoy freshly baked bread regularly. Video Recipe.
Ingredients
- bread flour or all purpose flour 3 cups
- yeast ½ teaspoon (active dry or instant)
- salt 1 tsp
- warm tap water 1 ½ cups (about 125-130° F )
- about 1 cup extra flour for shaping
Instructions
Preparing the dough
To start, add the flour, salt, and yeast to the inner pot of the Instant Pot and mix it well.
Gradually add water and use a wooden spoon to combine it until it forms a wet sticky dough.
Next, close the lid to the Instant Pot and allow the dough to ferment for an hour on yogurt mode until it becomes puffy and dotted with bubbles.
Once the hour has passed, open the lid of the pot. First, wet your hands and then gently stretch and fold the dough in the center of the pot.
Next, close the lid and allow the dough to rest for 15 minutes on yogurt mode.
After 15 minutes, open the lid again and repeat the process of stretching and folding the dough.
Allow the dough to rest again for 15 minutes on yogurt mode. After 15 minutes, stretch and fold the dough one last time.
The dough should be puffy but still wet and sticky.
Finally, place the lid back on top and allow it to rest for 30 more minutes on yogurt mode.
Shaping and Baking the bread
When the dough is in its final proofing, preheat the oven to 450 F or 230 C. Place an oven safe bowl with at least 2 cups of water on the bottom In the bottom rack.
Next, line a cookie sheet with parchment paper and then dust it generously with flour.
Carefully transfer the dough onto the parchment paper. You need to make sure you don’t destroy the air pockets as you place the bread on the sheet.
Dust more flour on top and use a scraper to divide the dough into two portions for two bread loaves. Use your hands to give the dough a rectangle. Or, you can use the scraper to give it a cleaner rectangle shape.
Next, place the cookie sheet with the dough on the middle rack of the oven. And then throw in a few ice cubes into the bowl of water on the lower rack.
Finally, bake the dough for 30 mins until the bread becomes golden brown on the top and sounds hollow when you tap the bread on the bottom.
Before serving, allow it to cool.
Notes
- Avoid over-baking the bread.
- Give the dough time to rise and make sure to fold it over. Do not skip the stretching and folding.
- You don’t need to knead the dough, this will make it too tough.
- Store in an airtight container for freshness.
- Don’t skip the water or ice cubes on the bottom rack of the oven. The environment should be moist when cooking.
- Use flour generously when shaping the dough.
- Prep Time: 2 hours
- Cook Time: 30 minutes







Kelly says
What do you use if you dont have a yogurt mode on your indtant pot?
Soniya Saluja says
Hi Kelly,
You can proof the dough in the oven unyil it doubles everytime . The IP yogurt setting, just shortens the times.
julie says
what do you use if you dont have yogurt mode on your ip
julie d cramer says
I have an IP but it doesnt have yogurt mode
Soniya Saluja says
Hi Julie,
You can let the dough proof in the oven until it doubles everytime. The IP yogurt setting just saves time.
Gretchen says
I made this today and was so worried it was going to turn out terrible. The dough was so sticky and kinda runny, so I was sure it would be a big fail. But, it turned into two incredibly bubbly loaves my family loved. Going to try doubling it since they inhaled both loaves.
Soniya Saluja says
Hi Gretchen,
Ciabatta is a 85% hydration bread, so the dough is sticky but the end product turns out great. Glad that your family loved it. Every time we bake this, it’s all gone before you know. Thanks for your feedback appreciate it.
Tejal Mistry says
This bread looks yumm..i need to try this recipe soon !!
Anvita says
Go for it babe you won’t regret it ?
Lindsay says
Do you vent the instant pot while it’s in yogurt mode proofing? (Already over halfway through making the bread and I think vented some steps and not others….probably should’ve figured this step out before starting but was too excited! ?)
TheBellyRulesTheMind says
Hi Lindsay,
It doesn't really matter if the vent is sealed or not when using yogurt mode in this recipe.
How did it turn out? Looking forward to hear your feedback.
Thanks,
Anvita.
Vicky says
Your homemade ciabatta bread is the bomb. Everytime I try a new repice I tend to mess up. I read your recipe and instructions many times and it came out perfect. My husband was soo impress. Thank you for sharing your recipe. Definately a keeper
Jennie says
Hi! I just tried this, and I do not have IP yogurt setting, so I did as you described and ended up with a ball....not a wet tacky dough. Any suggestions? TIA as I'm looking forward to this yummy looking recipe
Diana Davis says
I’m wondering if my Ninja pressure cooker is too hot on the yogurt setting. It was fine at 1 hour, but at the first 15 minute interval, the bottom had started to cook. My cooker defaults to high on yogurt setting, should I have lowered that? I want to try it again.
Sarah says
@Diana Davis, I have an IP and a Foodi and have made this bread in both. I should say tried to make in both because I had the same problem you had when I used the Foodi. If you have a bowl that will fit inside, maybe that would help with the dough getting too hot and sticking to the bottom.
Christine says
Do you mill your own flour? What kind would you use?
Erin says
Omg this bread turned out so good & it was very easy to make! My family ate both loaves in minutes. Maybe I will double the recipe next time.